Great documentation has been carefully scrutinized in technical content and language reviews. Code review tools provide a nice framework for reviewing documentation, but out of the box, they only you changes in the raw source files. By setting up a CI/CD pipeline, reviewers can also get to preview the final output. Here’s how you can do it!
Contents
Introduction
This article assumes we’re working with git as a version control system. This won’t be a step-by-step tutorial. View it more as a set of recommendations, pointers, and examples for how to go about automating your project! The CI config examples are simplified and based on GitHub Actions, but the general principles applies whichever CI tool you might be using.
A typical, git-based workflow goes something like this:
- A new branch is created for an update.
- Updates are committed and pushed to the remote.
- A pull/merge request is opened.
- Updates are reviewed by stakeholders.
- Once approved, the updates are merged back to the main branch.
In my experience, when this workflow is applied to documentation updates, that usually means content is reviewed in a code review tool. These tools come with features such as highlighted diffs, and line comments.
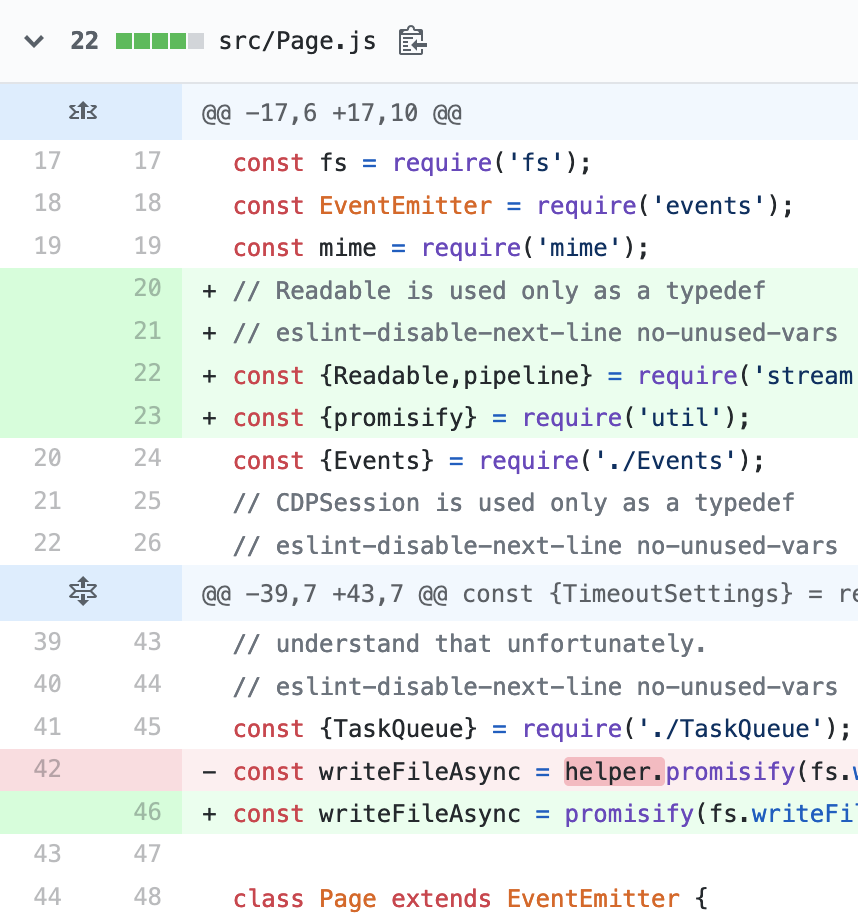
Reviewing Code on GitHub
While good enough for reviewing source code, it’s sometimes awkward to review content this way. You probably want to see it in it’s final form, graphics and stylesheets included. To do that, we can set up automated jobs for building and deploying our documentation, for each individual branch and pull request. This way, you can review what a documentation update will look in it’s final form, while the review remains an integrated part of the git workflow.
Triggers
The first thing we need to do is to decide when we want the jobs to trigger. CI jobs can be triggered to run whenever a specific event occurs related to a repository. Example events that can trigger a job are:
- Branch gets created
- Commit gets pushed
- Pull request is opened
- Pull request receives a comment
- Pull request receives a new commit
- Pull request is merged
For the purpose of generating a preview build, pull request is opened would be a suitable trigger. Additionally, you probably also want pull requests receives a new commit build and publish again.
In most cases, it’s simply better to just run these jobs on every commit. Running a full build at every change is a way of validating that you didn’t introduce any errors with your most recent update.
Things might be looking OK when you’re working on your update, and previewing your content offline. But static sites served locally will normally run in a development environment, which might allow the site to build, even though it contains errors. Running a production build in the CI pipeline will expose errors that you might have otherwise overlooked, link could cause builds to fail, because the thresholds are more strict.
Things might be looking OK when you’re working on your update, and previewing your content offline. But static sites served locally will normally run in a development environment, which might allow the site to build, even though it contains errors. Running a production build in the CI pipeline will expose errors that you might have otherwise overlooked, like broken links, because the thresholds for production builds are more strict.
name: documentation ci

# When to run:
on: [ push, pull_request ]
Review Features
When generating builds for reviews, you might want to include some features specifically for review or internal purposes. For example, I like to include, on every page, some management metadata about the page:
- The name of the person who last updated the page
- The hash of that commit
- Commit message
- Time of the update
- Link to the commit/file on GitHub
To achieve this, we can run review build in a special environment: review (or whatever you choose to call it). And in the templates that build the documentation, we will listen for what environment that the build is running in:
<body>
  <header class="dark">
    {{ partial "header.html" . }}
  </header>
  <main class="light">
    {{ if eq (hugo.Environment) "review" }}
      <aside class="review-pane">
      <h3>Page info</h3>
      {{ if .GitInfo }}
        {{ with .GitInfo }}
          <h4>Author</h4>
          <p>{{ .AuthorName }}</p>
          <h4>Date</h4>
          <p>{{ .AuthorDate.Format "2006-01-06" }}</p>
          <h4>Commit</h4>
          <p>{{ .AbbreviatedHash }}</a></p>
          ...
This will output a review-pane containing various git details, but only if the build is running in a review environment. Check out this example:
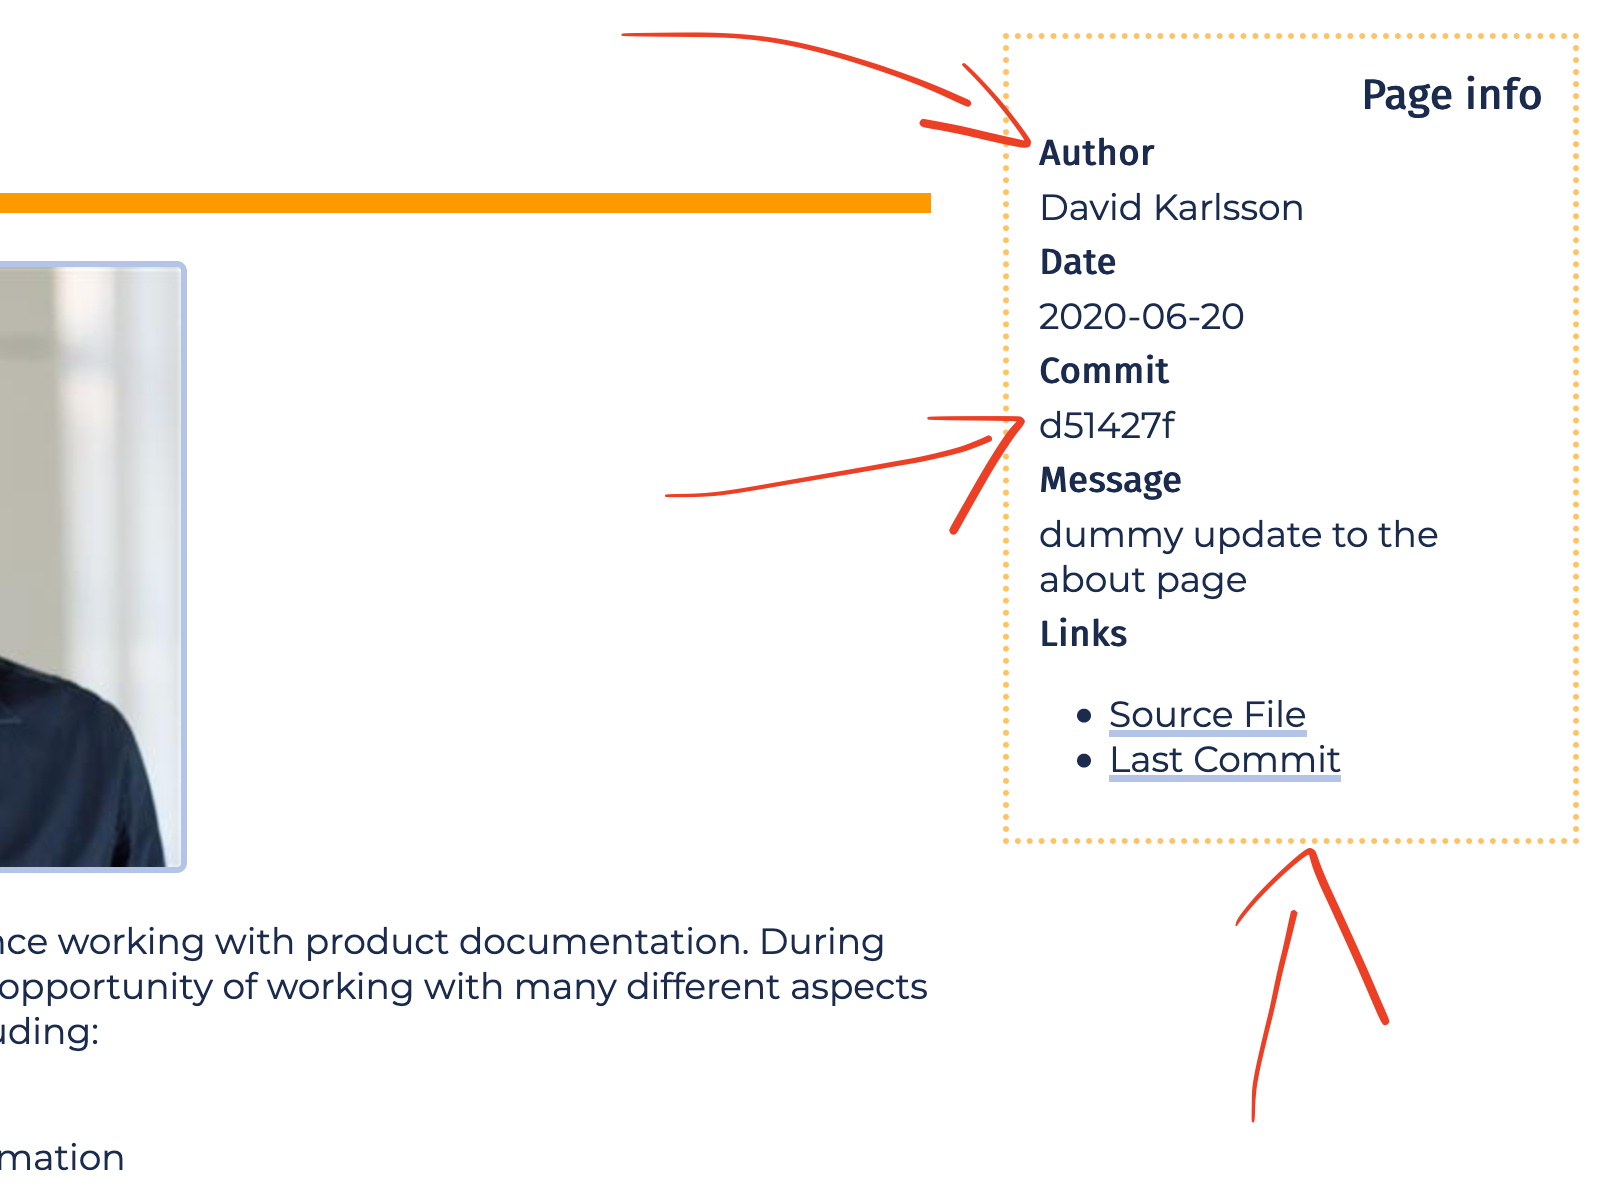
Git info pane for review
Building
Now the steps of the actual pipeline. It consists of three parts:
- Build
- Test
- Deploy
You could configure these to run either as distinct jobs or phases of the pipeline, or you could just run all of the steps as a single job. In this example, I’ll illustrate it as two jobs: one for building and testing, and one for deploying. Sometimes you can get away with running it all as a single job because it’s quicker. Sometimes it’s cleaner to create multiple jobs. Depends! For example, with GitHub Actions or GitLab runners, the build artifacts must be uploaded and downloaded between jobs. Unnecessary! With other CI tools like Jenkins, that limitation doesn’t necessarily apply.
So my part one, the build and test, involves five steps:
- Installing the required packages on the runner
- Installing the project dependencies
- Building
- Testing
- Saving the build artifact
It’s simply a matter of defining this sequence of steps in a yaml config.
jobs:
  create-preview:
    runs-on: ubuntu-latest
    steps:
      - uses: actions/checkout@v2
      - name: Set up Hugo
        uses: peaceiris/actions-hugo@v2
        with:
          hugo-version: '0.71.1'
          extended: true
      - name: Set up Python
        uses: actions/setup-python@v2
        with:
          python-version: '3.7'
      - name: Install dependencies
        run: |
          python -m pip install --upgrade pip
          pip install pytest
      - name: Build
        run: hugo -e review --minify
      - name: Test
        run: pytest
      - name: Save build
        uses: actions/upload-artifact@v1
          with:
            name: site-artifact
            path: public
What kind of tests you will want to run in this pipeline depends on the size and nature of the project. But there will always be gotchas that you will want to check after the build has run:
- Whether there are any missing locales, pages, figures.
- Mention of deprecated commands and parameters.
- Metadata like categories and keywords are used according to your taxonomy.
Deploying
The final step of the pipeline is the deployment; for people to access the build, it must be uploaded to a web server. Exactly how to do this depends on the type of hosting service or infrastructure you use. The easiest for integrating deployment in a CI/CD pipeline, is if there’s a CLI tool that you can use. An lightweight example of that is surge.
Deployment will always contain some sensitive information, like tokens or secrets or ssh keys. Never run a CI job with sensitive information like this in plain-text. Make sure they are encrypted as secrets or deploy keys or similar.
Below is a simple example of deploying a site using the Surge CLI tool, installed via NPM. The domain name and access token are encrypted as GitHub secrets.
jobs:
  # create-preview: ...
  deploy-preview:
    runs-on: ubuntu-latest
    steps:
      - name: Fetch build
        uses: actions/download-artifact@v1
          with:
            name: docs-build
      - name: Setup node
        uses: actions/setup-node@v1
          with:
            node-version: '12.x'
      - name: Install surge
        run: npm install -g surge
      - name: Deploy site
        run: |
          surge docs-build
          --domain ${GITHUB_REF##*/}$--{{ secrets.SURGE_DOMAIN }}
          --token ${{ secrets.SURGE_TOKEN }}
For pull request review deploys, deploy the docs on a subdomain which includes the unique id of the branch that’s the origin of the PR. The resolved domain name from the example above will be something like: branch123--repo456.surge.sh.
CI Tools
This stuff is pretty straight-forward to set up using the built-in CI/CD tools that git hosting platforms offer. An even easier way to do it, and how I have set it up for this website, is using Netlify Build. Netlify connects to your repo, and automatically sets you up for continuous deployment.
For the docs site of a company, the reality is that you might not be able to pick Netlify (or equivalent) for site hosting and deployment automation. If that’s the case, then you’re left with the following options:
- Your git hosting platform’s built-in CI tool. (e.g. GitHub Actions)
- A dedicated CI service provider. (e.g. Travis CI)
- An on-prem and self-hosted CI pipeline. (e.g. Jenkins)
There are a number of things you need to consider when selecting which approach is appropriate for your situation. I tend to reach for the built-in tools like GitHub Actions or GitLab CI. They’re really easy to set up, the instructions lives right in the content repository, and you get a lot of control.
If you’re working with an app or other software product, then your company likely already has a pipeline for building the product itself. It might be a good idea to integrate with the main pipeline, especially if you’re working with a monorepo of code and documentation together. Talk to your CI/CD architect! If the documentation lives in a separate repo, you can still trigger a documentation build from the main pipeline if you want, using the API of the repository manager. (GitLab example)
I’m currently working on a project that involves deploying static sites as Docker containers on a Kubernetes cluster. It’s a really complex and exciting solution, and I hope I will be able to write a couple of words on my experiences with it in the future!